
Adding your first property and units
by Platuni | 30 Dec, 2025 | 5 mins read
Platuni
30 December, 2025
5 mins read
Adding your first property in Platuni Property Manager builds the foundation for everything you will do on the platform. Each application, payment, lease, maintenance request and resident interaction is connected to a property record and a unit inside that property. A clear setup ensures that your workflows remain organized, your team can work efficiently and your residents receive accurate information.
This guide explains each step in detail, from creating the property record to adding buildings, floors and units, and how to connect the essential details that bring your property to life inside Platuni.
Creating a property record
The property record is the highest level of structure in Platuni. It represents the physical address you are managing and holds all associated buildings, units and operational details.
Steps to create a property record
- Go to the Properties section in your dashboard.
- Select Add Property.
- Enter the property name, which may be the building’s official name or a label your team uses for internal organization.
- Enter the full address. This ensures that verification, communication, listings and maintenance tasks align with the correct location.
- Choose the property type, such as single family, multi family, student housing or mixed use.
- Add optional notes that will help your team understand the property’s purpose or unique conditions.
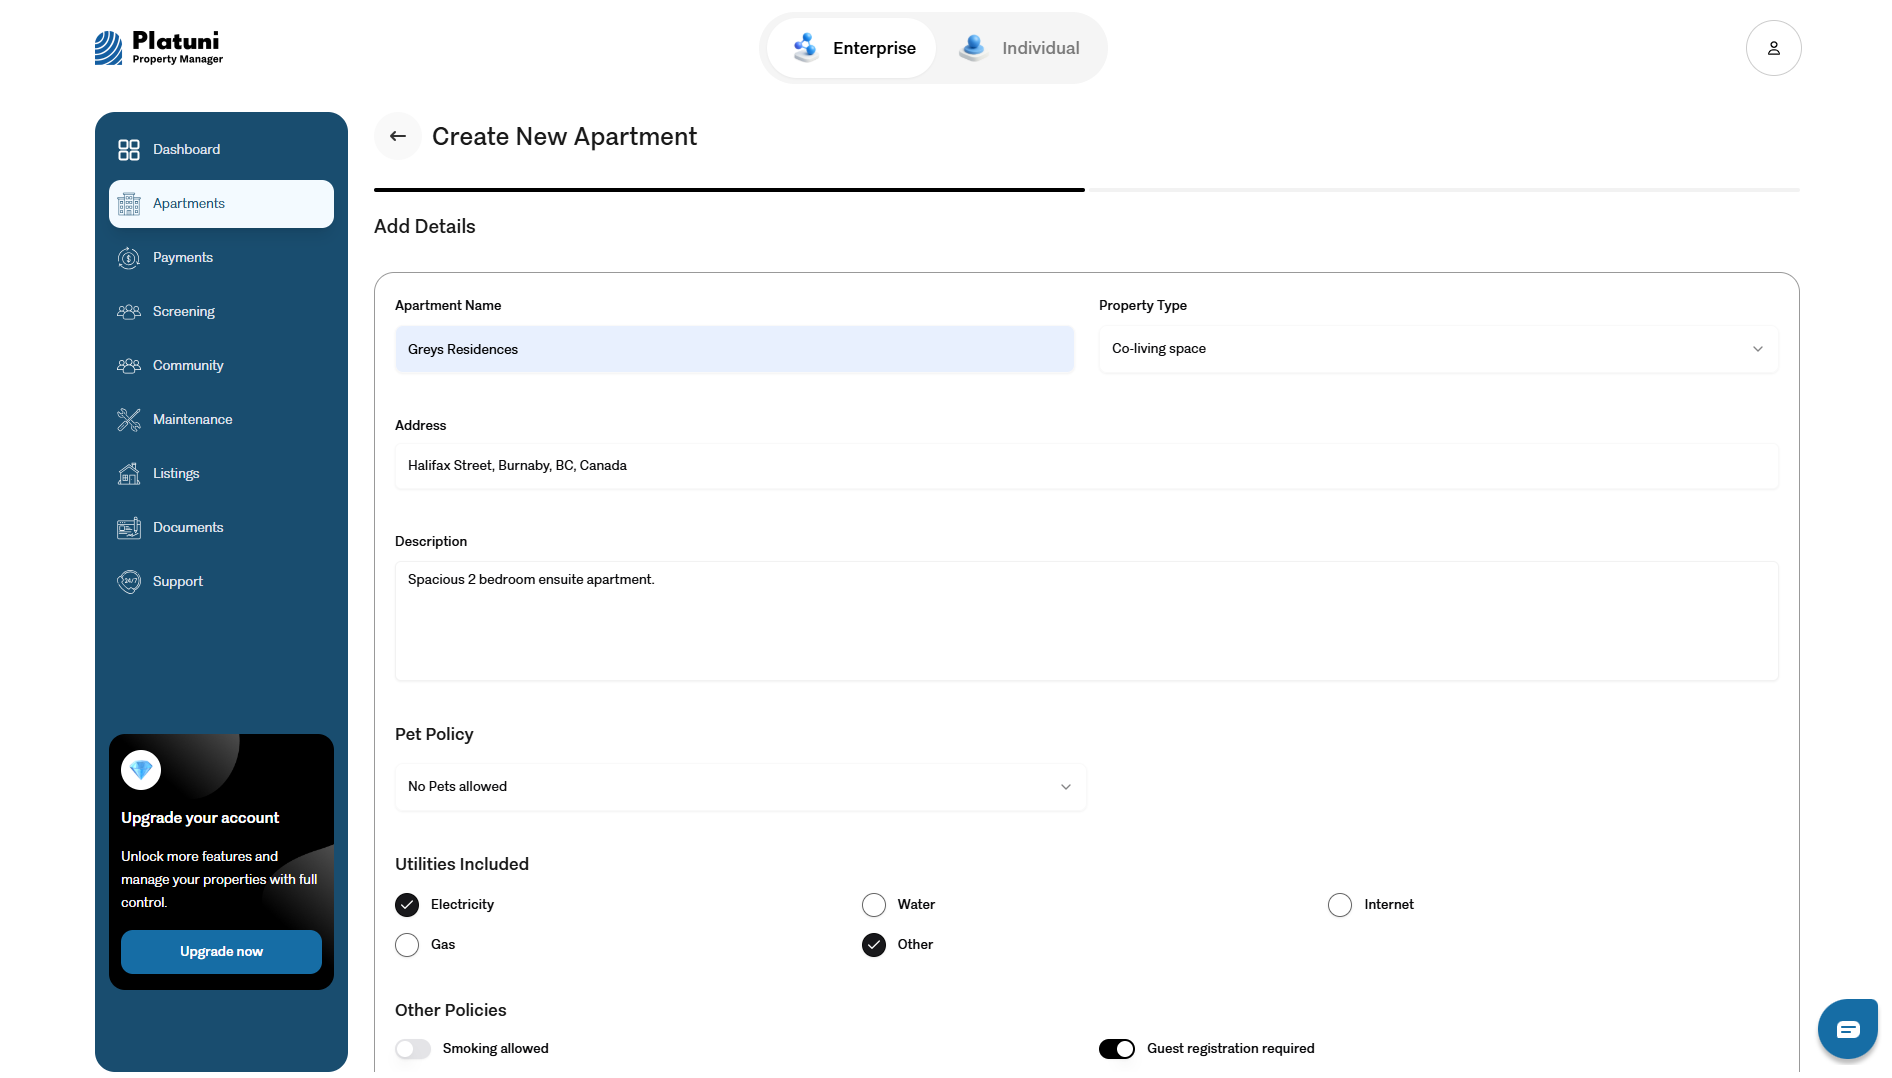
Once the record is created, the property becomes the anchor point for your units, documents and daily tasks.
Adding buildings, floors and units
The next step is adding the structure within the property. Platuni supports simple structures, such as single family homes, and more complex layouts, such as multi building assets or student housing with multiple floors and rooms.
Adding buildings
If your property includes multiple buildings, add each one as a separate section inside the property. This helps your team assign units, track maintenance and manage operations with clarity.
• Name each building clearly, using labels such as Building A or North Tower
• Add any optional notes that help differentiate buildings with special conditions
Adding floors
For multi level buildings, floors can be added to reflect the physical layout.
• Adding floors helps with navigation and reporting
• Floors also support grouping of maintenance tasks and unit organization
Adding units
Units are the core of your structure. Every resident, application and lease connects to a specific unit.
To add a unit, you will enter:
• Unit number or name
• Unit type, such as studio, apartment, suite, room or shared bedroom
• Rent amount
• Deposit rules
• Lease term structure
• Utility and fee information
• Whether the unit is available, occupied or being renovated
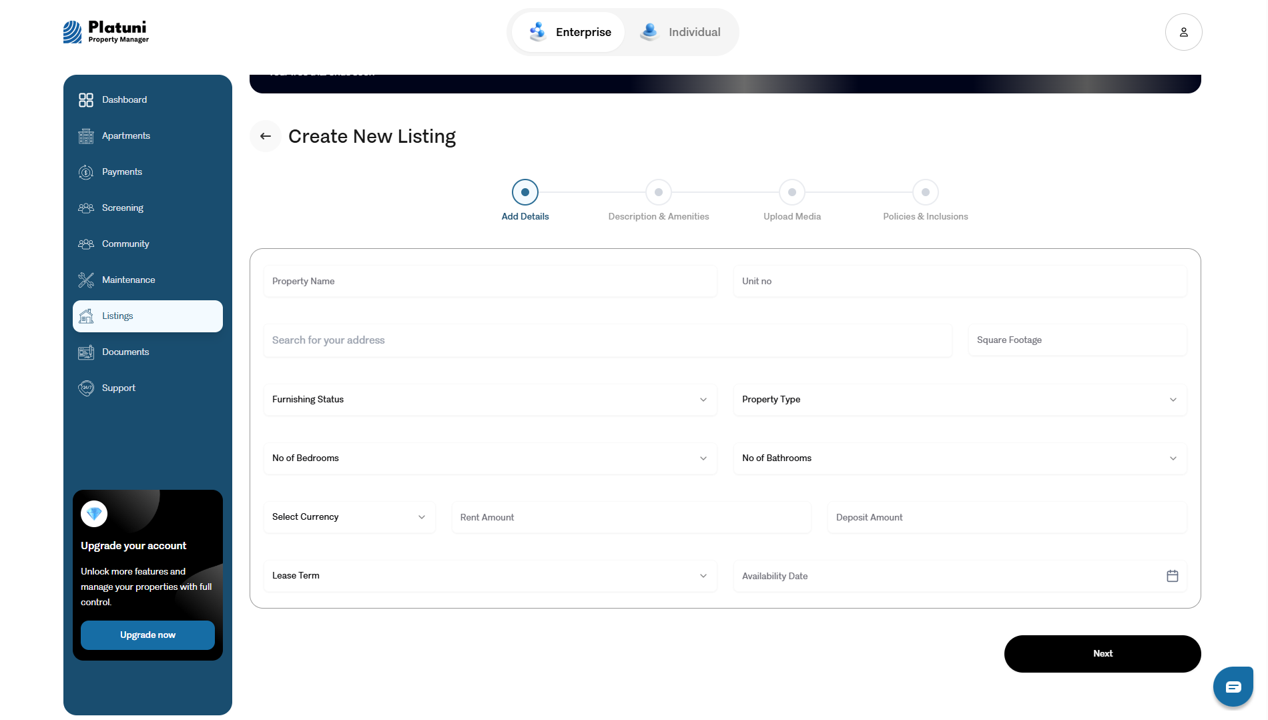
Each unit you create becomes a selectable space in applications, leases, maintenance tasks and financial tracking. A clear unit setup reduces confusion and keeps your entire workflow aligned.
Connecting property details such as address, type, photos and amenities
To complete your property setup, add the details that help your team operate smoothly and that residents will rely on.
Address and property type
Platuni uses the property address to align maintenance routes, resident communication, verification checks and listings. Confirm that the address is correct and matches any external records your team uses.
Choose the correct property type. This influences how certain features behave, such as roommate matching for student housing or unit grouping for multi family properties.
Photos
Add high quality photos that reflect the property and its units. Photos support team coordination, create clarity for residents and improve listing accuracy when units become available.
Include images such as:
• Exterior views
• Common areas
• Hallways or shared spaces
• Sample units or staged rooms
• Amenities such as gyms or study lounges
Amenities
List the amenities available at the property. These may include:
• Parking • Laundry • Fitness rooms • Study areas • Outdoor spaces
• Security systems • Accessibility features
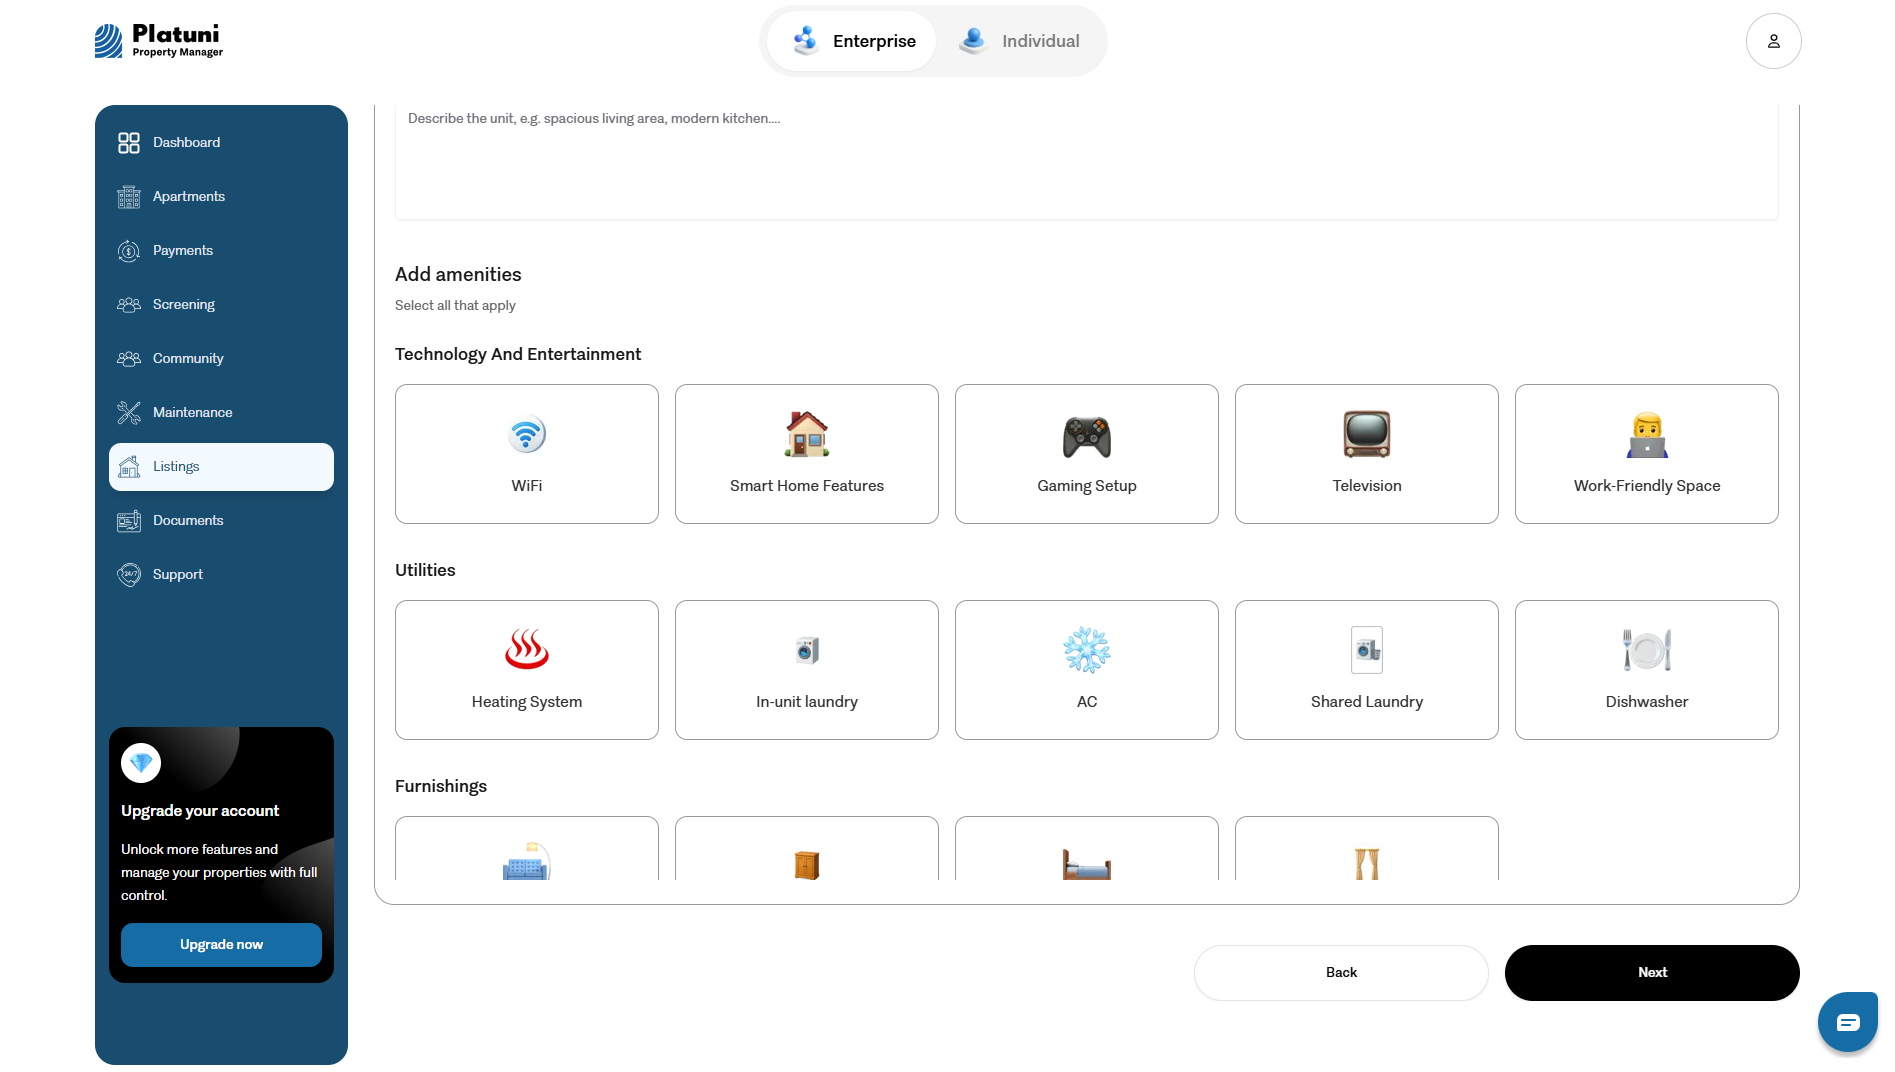
Amenities appear in listings and help your team respond to resident questions more easily.
Operational notes
You can also include internal notes for your team, such as:
• Cleaning schedules
• Renovation plans
• Special considerations for student move in periods
• Entry instructions or access codes
These notes do not appear to residents and help your team coordinate building operations with consistency.
Bringing the setup together
Once your property, buildings and units are fully entered, you will be ready to activate features such as applications, payments and maintenance. This structured base allows Platuni to connect each part of your workflow, from the first inquiry to the final move out.
If you want, I can now write the next article, Managing multiple properties and portfolios, to continue building out this section of your Help Center.
Stay Informed
Subscribe to the Platuni B2B Newsletter to receive industry insights,
new feature announcements, and exclusive growth reports